|
Step
|
Action
|
|
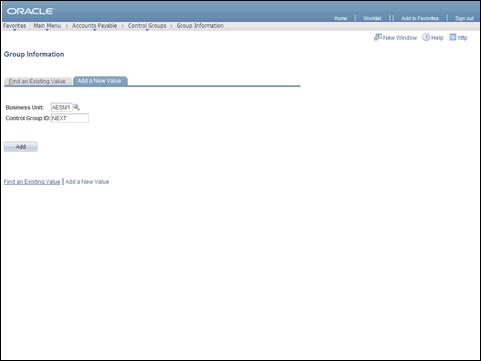
1.
|
The Business Unit
defaults in. The Control Group ID will
default in as NEXT. Once the group information is saved, Core-CT will
generate an ID for this Control Group.
Click the Add button.

|
|
2.
|
The Status defaults
to Open. There are six options for
Status but Core-CT only uses four. Entry Set
Aside and Supervisor Set Aside
are not advised.
When a control group is created and saved, the status will
automatically update from Open to Assigned so that the Assigned To voucher
processor can create the related vouchers.
After all vouchers are created for the control group, the
status will change from Assigned to Ready for Review.
Once the vouchers are reviewed by the Supervisor, the
control group must be changed from Ready for
Review to Verified. This
will allow the vouchers to proceed to payment.
|
|
3.
|
Running a tape is optional, but advisable. This will verify
that the correct dollar amounts were used when creating the vouchers. The
total here must agree with the total amount from the vouchers created.
Click the Run a Tape checkbox.

|
|
4.
|
After checking the Run a Tape
checkbox, an Adding Tape group box
will appear. This is where you enter the total amount to be paid for each
voucher in the control group. Every voucher amount entered here will sum in
the Gross Amt in the Control Total groupbox Gross Amt field (to the left).
Enter 5.00 in
the Adding Tape field.
|
|
5.
|
Click the Add button
to add a new voucher.

|
|
6.
|
Enter 6.00 in
the Adding Tape field.
|
|
7.
|
Click the Add button.

|
|
8.
|
This control group will have three vouchers for these three
total amounts. This controls what is created and for how much.
Enter 15.00 in
the Adding Tape field.
|
|
9.
|
Enter the UserID of the voucher processor you are assigning
the control group to in the Assigned to
field. This person must enter the vouchers for this group.
Enter Ives-ParisiJ in
the Assigned to field.
|
|
10.
|
This control group is for 3 vouchers totalling $26.00.
To verify/update the accounting details of the Control
Group, click the Accounting tab.

|
|
11.
|
Vouchers in a control group will not automatically post
when ready unless Post Group is checked.
Click the Post Group checkbox.
This will post the vouchers when they are ready for Voucher Post.

|
|
12.
|
Verify that all other fields on the Accounting Page are as
shown.
Click the Assignment tab.

|
|
13.
|
Checking the Reserve Voucher
Numbers option in the Voucher
Numbering groupbox is optional. Doing
so will reserve the voucher numbers for this control group. If checked,
the Assignee cannot create other vouchers until those reserved for this
control group are completed. (This is very controlling)
|
|
14.
|
Click the Save button.

|
|
15.
|
Click the Yes button
to update this control group's status to Assigned.

|
|
16.
|
A Group number is
now applied and the group is in Assigned
status.
The Gross Amount Difference
is 26.00 and Voucher Totals Difference
is 3.
An Assigned
date/time is applied as well as a Due date/time.
The vouchers for this control group will now be created by
the Assigned To voucher processor
listed.
|
|
17.
|
The voucher processor who was assigned this control group
is responsible for creating the related vouchers.
This page shows the summary of the vouchers created and
amount totals.
|
|
18.
|
This image shows one voucher has been created and two are
pending.
Click the Vouchers tab
to view voucher details.

|
|
19.
|
Once all the vouchers are created, the Difference will be 0.
Click the Assignment tab.

|
|
20.
|
Click the Status list.

|
|
21.
|
Click the Ready for Review list
item.

|
|
22.
|
Once all three vouchers are created, and the control group
is Ready for Review, click the Save button.
The supervisor should now review each voucher for approval and update the
control group's status.
Click the Save
button.

|
|
23.
|
Once you have reviewed and approved the vouchers in this
Control Group, you should update the Status to Verified.
Click the Verified list
item.

|
|
24.
|
Saving the Group with a Verified
Status allows the vouchers to proceed through payment.
Click the Save button.

|
|
25.
|
Saving the Control Group populates the Assigned Date/Time
and calculates the Due Date/Time for the Assignee.
End
of Procedure.
|